Core Polishing Techniques and Practical Guide for Tungsten Carbide Dies
1. Introduction Tungsten carbide (cemented carbide) dies occupy a central position in precision die manufacturing due to their exceptional high hardness, superior wear resistance, and excellent thermal stability. However, the […]
1. Introduction
Tungsten carbide (cemented carbide) dies occupy a central position in precision die manufacturing due to their exceptional high hardness, superior wear resistance, and excellent thermal stability. However, the high hardness of tungsten carbide also makes die polishing one of the most technically challenging processes in die machining. Compared to conventional steel, tungsten carbide die polishing demands extremely strict control of process parameters, high compatibility of polishing materials, and a significant skill threshold for operators.
This article systematically organizes the core polishing techniques for tungsten carbide dies from four dimensions: pre-polishing preparation, polishing method selection, in-process control points, and post-polishing treatment, providing actionable technical references for professionals in the die manufacturing industry.
La nostra attività in fabbrica: parti in metallo duro, parti di stampi, stampi a iniezione medicali, stampi a iniezione di precisione, stampaggio a iniezione di teflon PFA, raccordi per tubi PFA. e-mail: [email protected],whatsapp:+8613302615729.
2. Pre-Polishing Preparation
1. Deep Cleaning and Rust Removal
Surface treatment before polishing is a critical prerequisite that determines the final polishing outcome.
- Purpose of cleaning: Thoroughly remove cutting oil, anti-rust agents, metal chips, and dust from the die surface to ensure full contact between the polishing medium and the substrate
- Purpose of rust removal: Eliminate surface oxide layers and rust marks to provide a clean, uniform base surface for polishing
- Recommended methods:
| Cleaning Method | Applicable Scenarios | Vantaggi | Precautions |
|---|---|---|---|
| Ultrasonic cleaning | Precision dies, complex cavities | Thorough cleaning with no dead zones, high efficiency | Cleaning solution must be replaced regularly |
| Chemical cleaning | Dies with heavy oil contamination | Removes stubborn oil stains | Pay attention to environmentally friendly waste disposal |
| Sandblasting rust removal | Large-area rust | High efficiency, uniform surface | Grit size must be selected according to die precision |
⚠️ Important Note: Tungsten carbide is relatively sensitive to acidic cleaning solutions. It is recommended to prioritize neutral or weakly alkaline cleaning agents and avoid prolonged immersion to prevent surface corrosion.
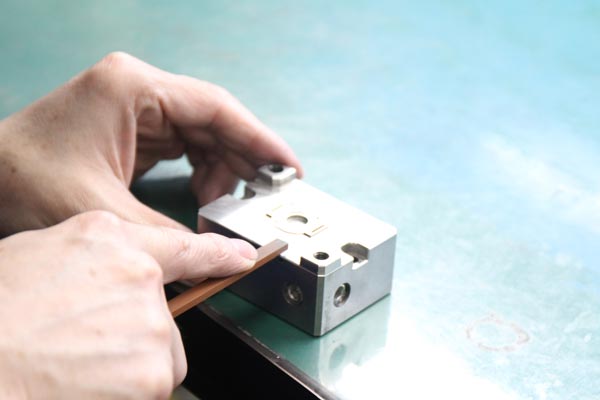
2. Surface Quality Inspection and Pre-Treatment
Before formal polishing begins, a comprehensive surface inspection must be conducted:
- Defect screening: Check for pits, cracks, sand holes, and other defects; if found, weld repair or remediation must be performed first
- Flatness inspection: Use a dial indicator or CMM (Coordinate Measuring Machine) to confirm surface flatness
- Roughness assessment: Obtain the initial Ra value using a surface roughness tester to provide data basis for polishing parameter setting
- Hardness confirmation: Some tungsten carbide grades can reach HRA 88-92; polishing strategy must be adjusted according to the actual hardness
3. Polishing Method Selection and Application
Given the high hardness of tungsten carbide dies, three major categories of polishing methods are primarily used in actual production:
1. Mechanical Polishing
Mechanical polishing is the most commonly used and widely applicable polishing method for tungsten carbide dies, gradually removing surface micro-protrusions through the mechanical action of abrasive media.
(1) Surface Grinder Polishing
Suitable for tungsten carbide dies with regular planar structures.
- Equipment selection: High-precision surface grinder (recommended accuracy ≤0.001mm)
- Wheel selection: Resin-bonded diamond grinding wheels, with grit progression from coarse to fine: #120 → #400 → #800 → #1500
- Key parameters:
- Wheel speed: 1,500–3,000 r/min
- Feed rate: 0.5–2 μm/pass
- Polishing pressure: 0.5–2 MPa (must be gradually adjusted based on surface feedback)
- Polishing paste selection: Prioritize diamond polishing paste, with grit progression from 6μm down to 1μm
(2) Cylindrical Grinder Polishing
Suitable for cylindrical, conical, and other rotational tungsten carbide dies.
- Clamping method: Use soft jaws or dedicated fixtures to avoid deformation caused by excessive clamping force
- Wheel selection: Cubic Boron Nitride (CBN) wheels or diamond wheels
- Key parameters:
- Spindle speed: 2,000–5,000 r/min
- Feed rate: 0.01–0.05 mm/r
- Polishing allowance: ≤0.005mm per pass
(3) Ultrasonic Polishing
Suitable for irregular cavities, deep narrow grooves, and other areas that are difficult to reach with conventional mechanical polishing.
- Working principle: Utilizes ultrasonic vibration energy (20–40kHz) to generate high-frequency micro-impacts of abrasive particles on the die surface, gradually removing the rough layer
- Vantaggi:
- No macroscopic cutting force; will not cause die deformation
- Capable of polishing complex cavities and micro-fine structures
- No mechanical stress layer on the surface
- Applicable grit size: Abrasive grit W3.5–W0.5; concentration adjusted according to surface requirements
2. Chemical Polishing
Chemical polishing removes micro-roughness peaks through the selective dissolution of specific chemical solutions on the tungsten carbide surface.
- Common formulations: Hydrofluoric acid (HF) + Nitric acid (HNO₃) mixed system, or dedicated tungsten carbide chemical polishing solutions
- Core advantages:
- Fast polishing speed; can process complex shapes simultaneously
- No mechanical stress; good surface integrity
- Suitable for large-area, high-efficiency polishing
- Key control points:
| Control Parameter | Typical Range | Consequence of Deviation |
|---|---|---|
| Chemical solution concentration | As recommended by supplier | Too high → over-corrosion; too low → poor effect |
| Temperature | 20–40°C | Too high → reaction runaway |
| Immersion time | 30 seconds–5 minutes | Too long → surface pitting |
⚠️ Safety Warning: Chemical polishing involves strong acid handling and must be performed in a fume hood. Operators must wear acid-resistant gloves, safety goggles, and other protective equipment.
3. Electrolytic Polishing
Electrolytic polishing is a precision polishing method that removes surface rough layers through the principle of electrochemical anodic dissolution.
- Working principle: The die serves as the anode; when energized in the electrolyte, the micro-protrusions on the surface have higher current density and dissolve faster, thereby achieving surface leveling
- Core advantages:
- Extremely high surface finish (can reach Ra below 0.025μm)
- No mechanical stress; no work-hardened layer generated
- Suitable for ultra-precision dies and optical-grade surface requirements
- Equipment requirements: DC stabilized power supply, dedicated electrolytic tank, temperature control system
- Applicable scenarios: Precision stamping dies and drawing die cavities with extremely high surface quality requirements
4. Key Control Points During Polishing
1. Precise Control of Polishing Pressure and Time
| Die Type | Recommended Polishing Pressure | Single Polishing Duration | Remarks |
|---|---|---|---|
| Planar dies | 0.5–1.5 MPa | 3–5 min/pass | Proceed in stages: rough → fine |
| Irregular dies | 0.3–1.0 MPa | 5–10 min/pass | Avoid excessive local pressure |
| Precision dies | 0.2–0.5 MPa | 2–3 min/pass | Principle of light pressure, multiple passes |
Core principle: “Light pressure, multiple passes, gradual progression” — It is better to polish several times than to apply excessive pressure in one pass.
2. Cleanliness and Management of Polishing Media
- Polishing paste: Stir thoroughly before use; clean residues every 15–20 minutes during use; replace immediately if discoloration or contamination is observed
- Cutting fluid: Maintain concentration within the recommended range (typically 5%–10%); check pH and concentration daily; perform a complete replacement weekly
- Grinding wheels: Dress regularly to keep the wheel sharp and surface flat; a dull wheel will cause surface burning
3. Real-Time Monitoring of Polishing Quality
- In-process inspection: After each polishing stage, use a surface roughness tester to measure the Ra value
- Ispezione visiva: Observe surface reflection uniformity under standard lighting (D65 light source recommended)
- Defect identification: Be alert to common defects such as orange peel, brush marks, and burn marks; adjust parameters promptly
5. Post-Polishing Treatment and Protection
1. Cleaning and Drying
- Use an ultrasonic cleaner with a neutral cleaning solution to remove residual polishing paste and cutting fluid
- Immediately blow dry with compressed air or place in a 60–80°C oven for 15–30 minutes
- Avoid water residue to prevent secondary oxidation
2. Final Quality Inspection
| Inspection Item | Inspection Tool | Acceptance Criteria (Reference) |
|---|---|---|
| Surface roughness | Surface roughness tester | Ra ≤ 0.2μm (precision grade); Ra ≤ 0.8μm (standard grade) |
| Dimensional accuracy | CMM/calipers | Conforms to drawing tolerance requirements |
| Surface defects | Visual + magnifier | No scratches, burns, or pitting |
| Hardness re-check | Rockwell hardness tester | No significant hardness change |
3. Protective Packaging and Storage
- Apply anti-rust oil or vacuum packaging immediately after polishing
- Store in a dry, constant-temperature environment (recommended: 20±5°C, humidity ≤60%)
- Avoid direct contact with other metal parts to prevent mechanical damage or galvanic corrosion
6. Summary
Tungsten carbide die polishing is a systematic engineering endeavor that integrates materials science, mechanics, and precision machining technology. Its core essentials can be summarized as follows:
- Thorough preparation — Cleaning, rust removal, and defect pre-treatment are the foundation of success
- Method suitability — Select mechanical, chemical, electrolytic polishing, or a combination based on die geometry and precision requirements
- Precise parameter control — Pressure, time, temperature, and other parameters must be strictly controlled, following the principle of “light pressure, multiple passes”
- Full-process monitoring — From in-process inspection to final quality check, ensure every step is traceable
- Adequate protection — Post-polishing cleaning, drying, and anti-rust treatment must not be overlooked
Mastering the above techniques, combined with accumulated practical experience in actual production, will enable stable achievement of high-quality polishing results for tungsten carbide dies.
Frequently Asked Questions (FAQ)
Q1: Burn marks appear on the surface during tungsten carbide die polishing. What causes this and how can it be resolved?
A: Burns are typically caused by excessive polishing pressure, overly high polishing speed, or a dull grinding wheel leading to localized overheating. Solutions: ① Reduce polishing pressure by 30%–50%; ② Inspect and dress the grinding wheel; ③ Increase cutting fluid flow or switch to a polishing fluid with better thermal conductivity; ④ Adopt an alternating “dry-wet” polishing approach for heat dissipation.
Q2: Which is more suitable for tungsten carbide dies — chemical polishing or electrolytic polishing?
A: Each has its advantages. Chemical polishing is simple to operate, cost-effective, and efficient, making it suitable for rapid large-area polishing. Electrolytic polishing delivers superior surface quality (mirror-grade achievable) with no mechanical stress, ideal for ultra-precision dies. In practice, a combined process of “mechanical rough polishing → chemical intermediate polishing → electrolytic fine polishing” is often adopted to balance efficiency and quality.
Q3: Can ultrasonic polishing completely replace mechanical polishing?
A: No, it cannot fully replace mechanical polishing. The advantage of ultrasonic polishing lies in handling complex cavities and micro-fine structures, but its material removal rate is relatively low, making it unsuitable for large stock removal. The best practice is to use ultrasonic polishing as a supplement to mechanical polishing for areas that mechanical tools cannot reach. The combination of both yields optimal results.
Q4: The surface roughness of a tungsten carbide die never meets requirements after polishing. What should be done?
A: Troubleshoot from the following aspects: ① Confirm whether the polishing paste grit is fine enough (0.5μm or finer diamond paste is recommended for the final pass); ② Check the pre-polishing surface quality — if the initial Ra value is too high (>Ra 3.2), additional rough polishing stages are needed; ③ Verify the die material is genuine tungsten carbide (some imitation materials have lower hardness and different polishing characteristics); ④ Consider adding electrolytic polishing as the final finishing step.
Q5: Are there any special requirements for operators polishing tungsten carbide dies?
A: Tungsten carbide polishing demands a high level of operator experience. Recommendations: ① Minimum 3 years of experience polishing hard materials; ② Proficiency in diamond wheel selection and dressing techniques; ③ Knowledge of safety procedures for different polishing methods (especially acid protection for chemical polishing); ④ Ability to judge polishing status by surface light reflection and possess a certain level of tactile judgment. Enterprises are advised to organize regular skills training and assessments.